
Carpentry on a Chromebook
Since grad school, I’ve appreciated the ability to jump between the command line terminal, desktop apps, and the browser. I recently needed a new laptop. I have long been primarily a Mac user, and I looked at new and refurbished Mac, linux, windows, and ultimately Chromebook laptops.
The price of a Chromebook made it an extremely attractive choice, but could it serve as my main laptop? There are many blog posts and reddit subthreads describing hacks for dual boot or VM terminals in unstable developer mode. However, I discovered Google recently released a Linux (beta) app within the stable ChromeOS channel, called “Crostini”. This allows users to simply opt-in to Linux on the settings page; no flags, no developer mode, no complicated hoops. The system requirements for Crostini mean that only a few Chromebooks are currently supported; I went with the Acer Chromebook 11 CB311-8H.
After checking for system updates and rebooting to ChromeOS release 71, I switched on Linux Apps for Chromebook in the settings menu. The system then automatically installed and set Linux up. Simple so far.
The terminal is launched from the app menu, and can be pinned to the shelf menu bar for easy access. I updated linux packages from the terminal with the following commands;
$ sudo apt-get update
$ sudo apt-get upgrade
With the terminal running, I prepped for the Software Carpentry Workshop I was attending at the University of Washington in Seattle. Our workshop would cover; The Unix Shell, Plotting and Programming in Python, and Version Control with Git. The setup section within each lesson describes what to download and install, and I followed the Linux instructions.
For example, in Plotting and Programming in Python the SWC team suggest downloading anaconda. I installed anaconda by following the linux instructions on SWC. I also found the anaconda installation instructions to be helpful.
Once the installer displays “Thank you for installing Anaconda 3!”, I entered the command
$ source ~/.bashrc
Then to start the notebook, I found the following command worked best:
$ jupyter notebook --no-browser
This launches a jupyter session without opening a browser window. Copy and paste the URL into a new chrome browser tab and I was ready to go.
Alternatively, to avoid the copy and paste step, I installed the chromium browser with the command;
$ apt-get install chromium
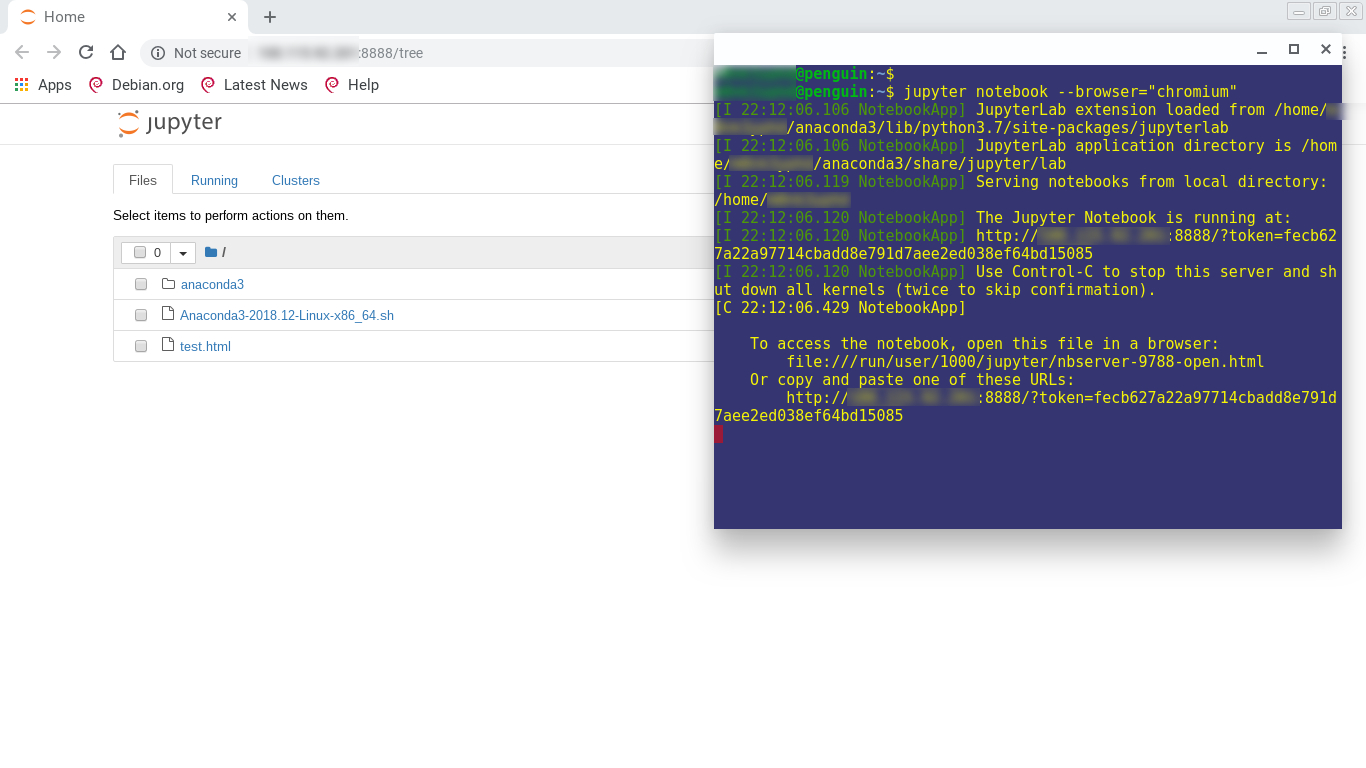
This allows the terminal to launch a jupyter session into a browser window within Crostini.
$ jupyter notebook --browser=”chromium”

The apt-get command can also be used to install other programs such as python3-pip, git, nano, and even Gimp, or LibreOffice if you’re inclined. Other Linux programs, such as atom, can be downlaoded and installed via the command line.
Overall, the ChromeOS Linux (beta) is helping me do everything I need. The Linux instructions from SWC were clear. I was able to follow along with my chromebook and enjoy the workshop. From my experience, running a chromebook with Crostini is pretty straightforward, even though it is not currently supported by the SWC team. This is a cheap, viable option for anyone learning to code.
Dialogue & Discussion
Comments must follow our Code of Conduct.